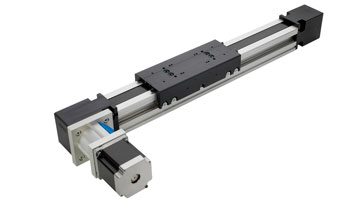
Thomson Linear Motion Optmized


Linear Motion Systems - Motor installation with redimout
Installation Instructions
For instructions on how to mount a motor onto a linear system using the RediMount adapter, watch the video below, read the following instructions or download the instruction manual here.

How to Mount a Motor Using the RediMount Adapter Kit
Mounting a motor to the RediMount™ flange
Your Thomson linear motion system will arrive with the motor interface flange and a coupling half
mounted to the unit. In a bag will be a loose motor coupling
half, motor bolts and plastic plug.
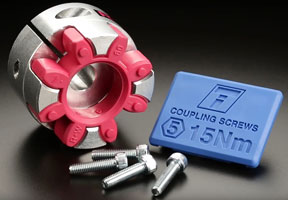
1. Locate the bag containing a coupling half, screws and plug.
Coupling half, screws and plug
Coupling half, screws and plug
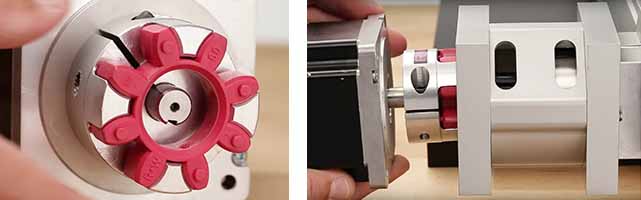
2. Remove the coupling half from the bag and slide it onto the motor shaft (it will be tightened to the shaft later). Then push the motor and coupling assembly into the flange, joining the coupling halves.
Coupler on motor (L); Motor to the assembly (R)
Coupler on motor (L); Motor to the assembly (R)
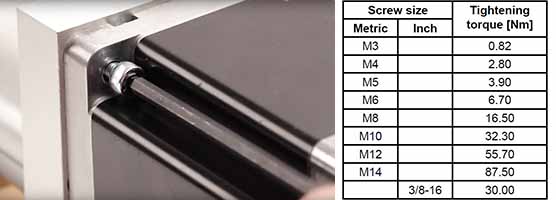
3. Tighten the screws, securing the motor flange to the RediMount flange. See the table below for the torque tightening specification based on the screw size. We recommend using a removable thread lock adhesive to secure the screws.
Tighten motor and torque table
Tighten motor and torque table
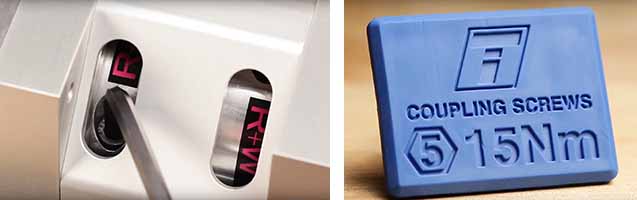
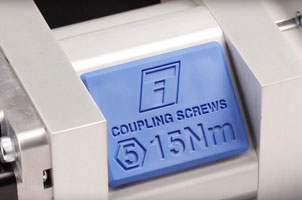
4. Secure the coupling to the motor shaft by using an Allen key to tighten the screw in the coupler through the slot in the adapter housing. The correct Allen key size and tightening torque can be found on the plastic plug (picture shows size 5 mm with 15 Nm tightening torque).
Tighten coupler and coupler plug
Tighten coupler and coupler plug
5. To seal the interior of the flange, press the plastic plug into the holes that form the coupling access windows.
Plug installed
Plug installed
6. Make a final inspection and test the unit before putting it into operation.
Admire the finished product